Sending business emails from a Gmail or Outlook address is a bit like handing out a business card written in pencil. It works, but it doesn’t exactly inspire confidence.
- What You Need Before You Start
- Step 1: Register a Domain (If You Don’t Have One)
- Step 2: Choose an Email Hosting Provider
- Step 3: Set Up Your Account and Create Your Email Address
- Step 4: Update Your DNS Records
- Step 5: Connect Your Inbox to an Email Client
- Common Problems (and How to Fix Them)
- Should You Add DMARC Too?
- Frequently Asked Questions
- Final Thoughts
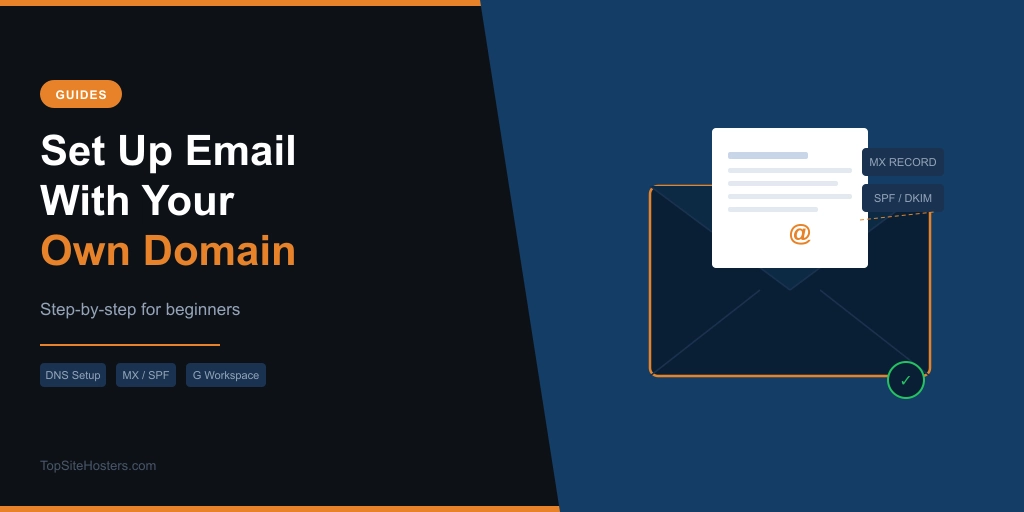
A professional email like [email protected] costs less than most people expect and takes under an hour to set up. The tricky part isn’t the signup. It’s knowing what you actually need: a domain, an email host, a few DNS records, and a way to read your mail. This guide walks you through all of it.
What You Need Before You Start
Three things to have ready:
A domain name. This is the part after the @ sign. If you already have a website, you likely own a domain. If not, you’ll need to register one first. You can check domain availability before you buy.
An email hosting provider. Your web host may include email, or you can use a standalone service like Google Workspace or Zoho Mail. More on that below.
Access to your DNS settings. These live with whoever manages your domain, usually your registrar or your web host. You’ll need to add a couple of records during setup.
That’s it. No server knowledge required.

Step 1: Register a Domain (If You Don’t Have One)
If you already own a domain, skip ahead.
If you’re starting from scratch, pick a registrar and register your domain. The domain itself costs around $10 to $15 per year for a standard .com. Look for:
- Free WHOIS privacy included (keeps your personal details out of public records)
- Auto-renewal option (so you don’t accidentally lose the domain and your email with it)
- A clean dashboard for managing DNS records
Namecheap and Porkbun both include free WHOIS privacy and have straightforward control panels. Both are worth a look if you’re starting fresh.
Once you have your domain, keep the login credentials somewhere safe. You’ll need access to the DNS settings in a minute.
Step 2: Choose an Email Hosting Provider
This is where most people get confused. Your web host and your email host don’t have to be the same company. Some hosting plans include mailboxes, which is convenient. Others don’t, or include them but with limitations that become a pain once your business grows.
Here are the main options:
Email Included With Your Web Host
Many shared hosting plans include email accounts as standard. If you’re hosting a small site and just want a basic inbox, this is the simplest route. The downside: email quality varies a lot between hosts, storage is often capped, and some shared hosts have poor sender reputation on their mail servers, meaning your emails are more likely to end up in spam.
Google Workspace
Google Workspace gives you Gmail with your own domain. You get the interface everyone already knows, strong spam filtering, and solid deliverability. Plans start at around $6 per user per month, billed annually. For most small businesses, this is the most reliable option.
Microsoft 365
If your team already uses Word, Excel, or Teams, Microsoft 365 makes sense. Business Basic starts at $6 per user per month and includes Outlook with a custom domain. The ecosystem works best if you’re already in the Microsoft world.
Zoho Mail
Zoho Mail has a free plan for up to five users and custom domains. It’s a solid pick if you’re watching costs and don’t need the full Google or Microsoft suite. The interface isn’t as polished, but it does the job.
Fastmail
Fastmail is a well-regarded privacy-focused option, popular with people who prefer to keep their data out of Google’s hands. Plans start at around $5 per user per month. You can bring your own domain, add aliases, and set up catch-all addresses.
For most people choosing between Google Workspace and Zoho Mail comes down to budget and whether Gmail’s interface is worth the cost. It usually is.

Step 3: Set Up Your Account and Create Your Email Address
Once you’ve picked a provider, sign up and create your account. Most will walk you through a setup wizard.
During setup, you’ll be asked to verify that you own your domain. This is done by adding a short TXT record to your DNS. The provider will give you the exact value to copy in. It looks something like this:
Type:  TXT
Name:  @
Value: google-site-verification=abc123xyz
Log into your DNS panel (at your registrar or host), find the DNS records section, and add it. Once saved, the provider’s system will check for it automatically. This usually takes a few minutes, occasionally up to an hour.
After verification, you can create your first email address. Pick something clean and professional. The classic options:
[email protected](works well for general enquiries)[email protected](personal and direct)[email protected](functional but a little impersonal)[email protected](for a dedicated support inbox)
You can create multiple addresses from the same account, which is useful if you want separate inboxes for sales, support, and general contact.
Step 4: Update Your DNS Records
This is the step that actually makes email work. Without the right DNS records in place, mail sent to your domain won’t know where to go, and mail you send will often be flagged as spam.
You’ll need to add three types of record:
MX Records (Mail Exchanger)
MX records tell the internet which server handles incoming mail for your domain. Your email provider will give you the exact values to enter. A typical setup for Google Workspace looks like this:
Type:     MX
Name:     @
Priority: 1
Value:    ASPMX.L.GOOGLE.COM

Type:     MX
Name:     @
Priority: 5
Value:    ALT1.ASPMX.L.GOOGLE.COM
Your provider’s setup guide will list exactly which records to add, usually two to five of them with different priority numbers.
SPF Record (TXT)
SPF tells receiving mail servers which servers are allowed to send email on behalf of your domain. Without it, your emails are more likely to be flagged as spam.
Type:  TXT
Name:  @
Value: v=spf1 include:_spf.google.com ~all
The exact value depends on your provider. Copy it from their documentation.
DKIM Record (TXT or CNAME)
DKIM adds a cryptographic signature to your outgoing emails so receiving servers can verify they actually came from you. Your provider will generate a key and ask you to add it as a TXT or CNAME record.
Type:  TXT
Name:  google._domainkey
Value: v=DKIM1; k=rsa; p=MIIBIjAN...
Most setup wizards will walk you through all three of these records. If yours doesn’t, check your provider’s help docs.
Once the records are in place, allow a little time for DNS propagation. Changes typically take effect within a few minutes but can occasionally take up to a few hours. You can use the DNS Lookup tool to check whether your MX records have propagated. To verify your SPF, DKIM, and DMARC records are set up correctly, MXToolbox is worth bookmarking, paste your domain in and it flags anything misconfigured.
Step 5: Connect Your Inbox to an Email Client
You can read and send mail through your provider’s web interface, but most people prefer to use a desktop or mobile app. This is straightforward.
If you used Google Workspace: You already have Gmail. Just sign in at mail.google.com with your new address. On mobile, add the account in the Gmail app under Settings.
If you used Microsoft 365: Open Outlook and add your account. The Microsoft 365 setup wizard often does this automatically.
For other providers: Use IMAP settings. Your provider’s documentation will list the server address and port numbers. In Outlook or Apple Mail, go to account settings and add a new IMAP account.
The IMAP settings usually look something like:
Incoming: imap.yourprovider.com, port 993, SSL
Outgoing: smtp.yourprovider.com, port 587, STARTTLS
Once configured, your inbox will sync across all your devices.
Common Problems (and How to Fix Them)
Emails landing in spam. The most common cause is missing or incorrect SPF and DKIM records. Go back and check both are set correctly. If they look right, allow more time for DNS propagation to complete.
“Domain not verified” error. This means the TXT verification record hasn’t been picked up yet. Double-check the record is saved correctly in your DNS panel and wait a bit longer. Some registrars take time to push changes live.
Can’t receive emails. Check your MX records are in place and correct. Use the DNS Lookup tool to verify what records are published for your domain.
Emails sending but not arriving. Occasionally the issue is a restrictive spam filter on the recipient’s end. Sending a test to a Gmail address is a good first check. If it arrives there, the problem isn’t on your side.
Wrong password / login errors. If you’re adding an account to a mail client, make sure you’re using an app-specific password if your provider requires one (Google Workspace does when 2-step verification is on). These are generated in your account security settings.
Should You Add DMARC Too?
Once SPF and DKIM are working, it’s worth adding a DMARC record. DMARC tells receiving servers what to do with emails that fail your SPF or DKIM checks, and it gives you visibility into whether anyone is spoofing your domain.
A basic DMARC policy starts permissive and lets you gather data before tightening it:
Type:  TXT
Name:  _dmarc
Value: v=DMARC1; p=none; rua=mailto:[email protected]
The p=none setting means no action is taken on failing emails yet. It just sends reports to the email address you specify. Once you’re confident everything is working correctly, you can move to p=quarantine and eventually p=reject.
It’s a small step that makes a meaningful difference to deliverability and protects your domain from being used in phishing attempts.
Frequently Asked Questions
Do I need a separate email host or can I use the one that comes with my web hosting? It depends on the host. Many shared hosting plans include email accounts and they work fine for low-volume use. If deliverability matters, or you’re sending a lot of email, a dedicated provider like Google Workspace gives you better spam filtering, higher limits, and more reliable inbox placement.
How much does a custom domain email cost? The domain itself is usually $10 to $15 per year. Email hosting adds $5 to $6 per user per month for Google Workspace or Microsoft 365. Zoho Mail has a free tier for up to five users if you want to start without any monthly cost.
Can I use Gmail with my own domain without paying for Google Workspace? Not directly. Google removed the free legacy option for new accounts several years ago. Zoho Mail’s free plan is the best alternative if you want a proper inbox at no monthly cost. You can also use a service like ImprovMX to forward emails from your domain to any Gmail account, though that only handles receiving, not sending from your domain.
What is an MX record? MX stands for Mail Exchanger. It’s a DNS record that tells other mail servers where to deliver email for your domain. Without it, nobody can send you mail.
How long does DNS propagation take? Usually a few minutes for most registrars. Occasionally up to 48 hours if changes are slow to propagate globally. In practice, most setups are working within an hour.
Final Thoughts
Setting up email with your own domain takes a bit of configuration upfront, but it’s a one-time job. Once your MX, SPF, and DKIM records are in place and your inbox is connected to your email client of choice, it just works.
The business case is straightforward. A branded email address signals you’re a legitimate operation. It improves deliverability. And it’s one of the cheapest credibility upgrades available, usually under $10 a month all in.
If you haven’t already registered a domain, start with the Domain Checker to see what’s available.