Moving your WordPress site to a new host sounds like the kind of task that ends in a broken site, a frantic support ticket, and a few hours of quiet panic. It doesn’t have to be.
- What You’re Actually Moving
- Choose Your Migration Method
- Which Migration Plugin Should You Use?
- Control Panel Migration Tools (Plesk, cPanel, DirectAdmin)
- Before You Start: Pre-Migration Checklist
- How to Migrate Using a Plugin (Step by Step)
- DNS Propagation: What It Is and What to Expect
- The Step Most Guides Skip: What Happens to Your Email
- Post-Migration Checklist
- Will This Affect My SEO?
- Frequently Asked Questions
- Final Thoughts
The process is well-established and, done in the right order, carries almost no risk. The sites that break during migration break because someone skipped steps, switched DNS too early, or forgot about their email. This guide covers all of it.
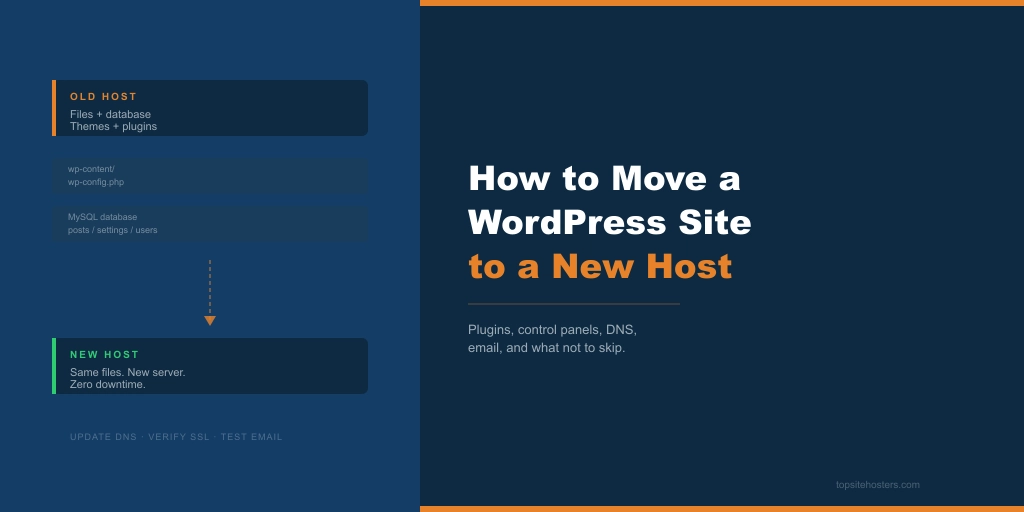
What You’re Actually Moving
Before you touch anything, it’s worth knowing what a WordPress site actually consists of. There are two parts: the files and the database. The files include your theme, plugins, uploaded images, and the WordPress core itself. The database contains your content: posts, pages, settings, users, and comments. Both need to move. Most migration problems happen when one part moves without the other, or when the connection between them isn’t updated after the move.

Choose Your Migration Method
There are four ways to migrate a WordPress site. The right one depends on your host, your technical comfort level, and how big your site is.
Option 1: Let your new host do it for free
This is the most underreported option in every migration guide on the internet. Many hosts include free migration as a standard part of signing up. Hostinger, SiteGround, Namecheap, Scala Hosting, and GreenGeeks all offer this to new customers. If you’re already switching hosts, it’s worth asking before you spend an hour with a plugin.
Behind the scenes, the host’s team is often using the same control panel tools described in Option 3. The difference is they do the work, and you don’t have to think about it. See the individual provider reviews for current details on what’s included.
Option 2: Use a migration plugin
Right for most people doing it themselves. Plugins handle the packaging and transfer of both files and database, and the better ones also handle URL replacement automatically. This is covered in detail in the sections below.
Option 3: Use your control panel’s built-in migration tool
Almost every guide on this topic jumps straight from plugins to manual FTP and skips this entirely. If you’re on a Plesk or cPanel host, there are powerful migration tools built directly into your control panel. These are covered in their section below.
Option 4: Manual migration via FTP and phpMyAdmin
This gives you the most control but requires comfort with FTP clients, database exports, and editing the wp-config.php file. It’s the right choice for massive sites where plugins hit upload limits, or for complex setups where something more automated isn’t an option. Manual migration is beyond the scope of this guide, but the approach is well-documented in the WordPress Codex.
Which Migration Plugin Should You Use?
If you’re going the plugin route, four options cover the vast majority of use cases.
Duplicator is the most broadly useful free option. It packages your entire site into two files: an archive (.zip) containing all your data, and an installer (.php) that sets up the site at the new location. The key advantage over other plugins is that Duplicator can install WordPress on an empty server, so you don’t need to set up WordPress first on the new host. It has a 4.9-star rating across over 1.5 million installations. The free version handles most sites comfortably. A Pro version at $49.50 per year adds drag-and-drop server-to-server transfer, which removes the need to download files to your computer at all.
All-in-One WP Migration is the simplest experience available. You export your entire site into one file, then drag and drop it into the new WordPress installation. The plugin automatically handles URL replacement as part of the process. The free version has a 512 MB size limit, which makes it best suited to smaller sites. If your site is under that threshold, and you want the fewest possible steps, this is a strong choice.
UpdraftPlus is primarily a backup plugin with migration as a secondary feature. The free version works for migration but involves more manual steps than Duplicator or All-in-One: you create a backup, download multiple separate files, upload them to the new host, and restore from there. If you’re already running UpdraftPlus for backups, using it for migration makes sense. A migration add-on is available for $30 separately if you want a more guided process.
WPvivid uses a key-based approach. You install the plugin on both sites, generate a key on the new host, paste it into the old site, and push the data directly. There’s no downloading to your computer in the middle, which makes it a good option for larger sites or anyone who runs into PHP upload limits with other plugins.
The recommendation for most people is Duplicator. If your site is small and you want the absolute simplest experience, use All-in-One WP Migration.
Control Panel Migration Tools (Plesk, cPanel, DirectAdmin)
This is the method that almost no WordPress migration guide covers, which is a shame because for the right situation it’s the most complete option available.

Plesk Migrator
If your current or new host runs Plesk, you have access to a tool called Plesk Migrator built directly into the control panel. It’s far more capable than any WordPress plugin because it operates at the server level rather than the application level.
Plesk Migrator handles the full move in one operation: website files, databases, email accounts and inbox contents, DNS zones, and SSL certificates. You log into Plesk on the destination server, open the Migration and Transfer Manager, enter the credentials for the source server, and it pulls everything across. It works between Plesk servers and can also pull from cPanel-based servers, which makes it useful even if you’re moving between hosts running different control panels.
The reason this matters for WordPress migrations specifically is the email problem. When you use a plugin to migrate WordPress, your email accounts are not included. Plesk Migrator moves email automatically. If your email is hosted on the same server as your site, and you want to move both in one operation without the manual email steps described later in this guide, Plesk Migrator is the right tool.
IONOS, Namecheap VPS, and a number of European hosting providers use Plesk. If you’re on one of these and moving to another Plesk host, open the control panel and look for the Migration and Transfer Manager before reaching for a plugin.
cPanel Transfer Tool (WHM)
cPanel has a built-in Transfer Tool inside WHM, which is the server-level admin interface above cPanel. It migrates full hosting accounts between cPanel servers including files, databases, email, cron jobs, and DNS zones. This is a server admin tool, not something available to individual shared hosting users, but it’s worth knowing about. When a host offers free migration and they’re running cPanel, this is almost certainly what their team is using on the backend.
DirectAdmin
DirectAdmin has a similar account transfer feature for moving between DirectAdmin servers. Like cPanel’s Transfer Tool, this is a server-level operation rather than something end users typically access directly.
When to use control panel tools instead of a plugin:
Use panel migration tools when you’re moving between two hosts running the same control panel, when you need email migrated alongside the site automatically, or when you have admin access to the destination server. Use a plugin when you’re on shared hosting without server-level access, or when you’re moving between hosts with incompatible control panels and neither offers a migration service.
Before You Start: Pre-Migration Checklist
Work through this before touching anything on either server.
- Take a full backup of your files and database, even if you’re about to use a migration plugin. The plugin is not your safety net. A manual backup is.
- Update WordPress core, all themes, and all plugins to their latest versions. Migrating outdated software creates compatibility problems.
- Delete unused themes and plugins. Every file you don’t need is a file the migration tool has to copy.
- Clean up spam comments, post revisions, and transient options in your database. This reduces the migration package size.
- Note your current PageSpeed score and TTFB as a baseline to compare after the move.
- Confirm the new host supports your required PHP and MySQL versions. Mismatched PHP versions are a common cause of post-migration errors.
- Lower your DNS TTL to 300 seconds. Do this at least 24 hours before you plan to switch. This is explained in the DNS section below.
- Check whether your email is hosted on the same server as your site or with an external service. This determines whether you need to take separate email migration steps. More on this shortly.
How to Migrate Using a Plugin (Step by Step)
These steps use Duplicator as the example. The approach is consistent with most other migration plugins, though the interface differs.
- Install and activate Duplicator on your current site from the WordPress plugin directory.
- Go to Duplicator in the dashboard and click Create New. Under Components, select All to include files and database.
- Click Next. Duplicator will scan your site for potential issues. Review any warnings, then click Build. Depending on site size, this may take a few minutes.
- Download both files when the build completes: the archive (.zip) and the installer (.php). Keep both.
- Log into your new hosting account. Create a new empty database and note the database name, username, and password.
- Upload both downloaded files to the root directory of the new host. Use FTP, SFTP, or the file manager in your hosting control panel. The root directory is usually public_html.
- Access the installer by navigating to yourdomain.com/installer.php in your browser. Because your domain still points to the old server, use the temporary URL your new host provides, or temporarily edit your local hosts file to preview the new site before switching DNS.
- Enter the database credentials from step 5 when prompted. Run the installer. Duplicator imports the archive and configures WordPress to connect to the new database.
- Log into WordPress on the new site using your normal credentials and test everything: pages, posts, images, forms, and plugins.
- Once satisfied the site is working correctly, update your DNS records to point to the new host.
After DNS is updated, most visitors will reach the new server within one to four hours. Some may still see the old site for up to 48 hours. This is normal. Leave the old site running until propagation is complete.
If you’re using All-in-One WP Migration instead, the process is similar: export from the old site as a single .wpress file, install WordPress on the new host, install the plugin, and import the file via drag and drop. The plugin handles URL replacement automatically.
DNS Propagation: What It Is and What to Expect
DNS propagation is the time it takes for the internet to update its records after you change where your domain points. When you switch your A record or nameservers to the new host, that change doesn’t take effect instantly everywhere. DNS servers around the world are caching your old records and need to refresh them.
In 2026, most resolvers update within one to four hours. Full global propagation can take up to 48 hours in some cases. During that window, some visitors will reach the old server and some will reach the new one. Your site doesn’t go offline. Both servers are running at the same time, serving the same content. There’s nothing to worry about.

The TTL trick is the one step most guides mention without explaining. TTL stands for Time to Live. It’s a number in your DNS records that tells other DNS servers how long to cache your records before checking for updates. The default is often 3,600 seconds (one hour) or 86,400 seconds (24 hours). If you lower it to 300 seconds at least 24 hours before you switch, you’re telling the world’s DNS servers to check for updates every five minutes. When you flip the switch, propagation completes in minutes rather than hours.
Log into your domain registrar or DNS provider, find the TTL setting on your A record, and change it to 300. Do this the day before you plan to migrate. After the migration is complete and DNS has settled, you can set it back to a higher value.
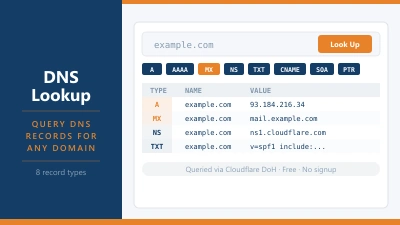
Use our DNS Lookup tool to check your current MX and A records, or check propagation status at WhatsMyDNS.net once you’ve made the switch.

The Step Most Guides Skip: What Happens to Your Email
This is the most commonly overlooked part of any WordPress migration and the one most likely to cause a real problem. Most migration guides either skip it entirely or mention it in one sentence.
If your email is hosted on the same server as your website (common with cPanel and Plesk shared hosting), it doesn’t move when your WordPress files move. The email accounts, inbox contents, and MX records all need separate attention.
There are three scenarios, and the right action depends on which one applies to you.
Scenario 1: You use an external email service
If your email runs through Google Workspace, Microsoft 365, Zoho, Fastmail, or a similar external provider, your MX records already point to that service rather than to your hosting server. In this case, do not change your MX records during the migration. Your email will keep working throughout the move, unaffected by anything you do with the hosting.
Scenario 2: You use server-hosted email (cPanel or Plesk mailboxes)
Before you switch DNS, take these steps in order. First, recreate all the same email accounts on the new hosting server. Second, log into the old server’s file manager and download a backup of the mail folder, which contains your inbox contents. Third, upload that folder to the new host. Fourth, switch DNS. Fifth, keep the old hosting account active until you’ve confirmed that email is sending and receiving correctly on the new server.
If you’re using Plesk Migrator or a host offering a full server migration, this step is handled automatically. Email accounts and inbox contents are migrated alongside the site. This is one of the practical advantages of using a control panel migration tool rather than a plugin.
Scenario 3: You’re not sure which applies to you
Check your MX records using the DNS Lookup tool. If your MX records point to Google, Microsoft, Zoho, or a similar provider, you’re in Scenario 1. If they point to your hosting server’s hostname (usually something like mail.yourdomain.com or a server IP address), you’re in Scenario 2.
The warning that matters: if you cancel your old hosting account before you’ve set up email on the new server and confirmed it’s working, you may lose access to your inbox contents permanently. Don’t cancel the old account until email is confirmed.
Post-Migration Checklist
Work through this before you cancel anything or tell anyone the move is done.

- Confirm SSL is active and https:// works correctly with the padlock showing in the browser.
- Go to Settings, then Permalinks, and click Save Changes. This regenerates your .htaccess file and prevents 404 errors on post and page URLs.
- Submit your contact form and verify you receive the notification email.
- Test the WordPress password reset function from the login screen.
- Check that all images, media files, and embedded content loads correctly.
- Run the Better Search Replace plugin to find and replace any remaining references to your old domain or old server URLs in the database.
- Run a new PageSpeed and TTFB test using the server response tester and compare to the baseline you recorded before migration.
- Submit your sitemap in Google Search Console, so Google can crawl the new server location.
- Monitor Google Search Console for 404 errors over the next 48 to 72 hours.
- Do not cancel your old hosting account for at least 7 days after the DNS switch.
Will This Affect My SEO?
The short answer is no, if you do it correctly.
Search engines don’t care which server your site runs on. They care whether your URLs are consistent, your SSL is active, and your content is accessible. A migration that maintains all three of those things is invisible to Google. Rankings don’t drop because you changed hosts.
What does hurt SEO during migrations is broken SSL (which causes browser security warnings that Google logs), accidental URL changes (which break inbound links), and extended downtime during a botched migration. None of those are consequences of moving hosts. They’re consequences of moving carelessly.
If Google crawls your site during the DNS propagation window, it may hit either the old or the new server. Both are running, both serving the same content over HTTPS. There’s nothing to penalise.
Submit your sitemap after the migration and keep an eye on GSC for a few days. That’s all the active SEO work required.
Frequently Asked Questions
How long does it take to migrate a WordPress site to a new host?
The migration itself, using a plugin like Duplicator, typically takes 30 to 90 minutes for a small to medium site. Larger sites or manual migrations can take several hours. DNS propagation, which happens after the migration is complete, adds one to 48 hours depending on TTL settings. If you lowered your TTL to 300 seconds before the move, propagation usually completes within an hour.
Can I migrate WordPress without any downtime?
Yes. The zero-downtime approach is to fully set up and test the new site before touching DNS. Your current site stays live throughout. When you’re happy the new site works correctly, you update DNS. During the propagation window, some visitors reach the old server and some reach the new one, but neither sees an offline site. The only way downtime happens is if you switch DNS before the new site is ready.
What happens to my email when I change hosts?
It depends on how your email is set up. If you use Google Workspace, Microsoft 365, or another external email service, nothing happens. Your email is unaffected. If your email is hosted on the same server as your website (cPanel or Plesk mailboxes), you need to migrate it separately before cancelling the old account. The full breakdown is in the email section above.
Do I need to reinstall WordPress on the new host?
It depends on the migration method. Duplicator does not require WordPress to be pre-installed on the new host. It installs WordPress as part of the migration process. All-in-One WP Migration does require a fresh WordPress installation on the new host before you can import. Check the requirements for whichever plugin you choose.
When is it safe to cancel my old hosting account?
Not before seven days after your DNS switch. Give DNS propagation time to complete fully, verify that email is working on the new server if applicable, and make sure nothing unexpected has broken. Cancelling too early is one of the most common causes of data loss during migrations.
Should I use Duplicator or All-in-One WP Migration?
For most sites, Duplicator. It’s more flexible, works on empty servers, and the free version handles a wider range of site sizes. If your site is under 512 MB and you want the simplest possible process, All-in-One WP Migration’s drag-and-drop approach is hard to beat. Both are reliable and well-supported.
What is DNS propagation and how long does it take in 2026?
DNS propagation is the period after you change your domain’s DNS records during which the update spreads across the internet’s DNS servers. In 2026, most resolvers update within one to four hours. Full propagation across all resolvers globally can take up to 48 hours. Lowering your TTL to 300 seconds at least 24 hours before the migration significantly speeds this up.
Can I use my hosting control panel to migrate instead of a plugin?
Yes, and for many situations it’s a better option than a plugin. Plesk Migrator, built into Plesk, handles files, databases, email, DNS zones, and SSL certificates in one operation. cPanel’s Transfer Tool does the same for cPanel-to-cPanel migrations at the server admin level. These tools are covered in detail in the control panel section above.
Final Thoughts
Migrating a WordPress site is one of those tasks that sounds harder than it is. The steps are well-established, the tools are reliable, and the main risk is getting the order wrong rather than the task being technically difficult.
The things that catch people out are not the migration itself. They’re the email accounts left on the old server, the SSL that wasn’t configured before DNS switched, the old hosting account cancelled a day too early, and the TTL left at its default so propagation takes two days instead of two hours.
Get those details right and the rest of it is straightforward. If you’re moving to a host that offers free migration, ask them to do it. If you’re doing it yourself, use Duplicator for most sites, or Plesk Migrator if your hosts support it. Test everything before touching DNS. Keep the old site running for a week.
Looking for a new host to move to? The shared hosting and managed WordPress hosting sections cover the options we’ve tested and recommend.